If your home has a pier and beam foundation — which describes a large portion of the housing stock in Tarrant, Wise, and Parker Counties, particularly homes built before 1970 — there’s a space beneath your feet that most homeowners almost never think about.
The crawl space.
That narrow gap between your floor and the ground is doing quiet, critical work. It houses your plumbing, often your electrical conduit, and the wooden structural members that support everything above. It’s also one of the most moisture-prone environments in any home — and in North Texas, where humidity swings dramatically between seasons and clay soil holds water long after a rain event, crawl space moisture is one of the most underdiagnosed causes of progressive foundation damage.
This guide explains what crawl space moisture looks like at every stage — from normal humidity to active structural deterioration — and what to do about it before it becomes a foundation repair project.
Why Crawl Spaces in North Texas Are Uniquely Vulnerable
Crawl spaces in most climates deal with moisture as a seasonal issue. In North Texas, the challenge is different because of two compounding factors:
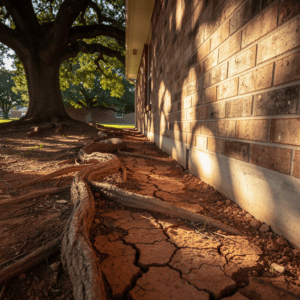
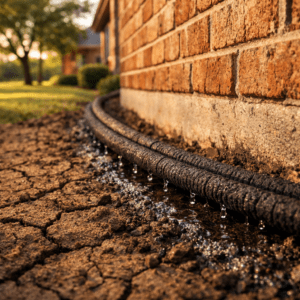
Expansive clay soil. The clay soil dominant across Tarrant, Wise, and Parker Counties retains moisture far longer than sandy or loam soils. After a significant rain event, the ground beneath your crawl space can remain saturated for days or weeks, releasing moisture vapor upward into the enclosed crawl space environment continuously.
Temperature differential. During hot Texas summers, the crawl space air is significantly cooler than the outside air. When warm, humid exterior air infiltrates the crawl space through foundation vents, it contacts cooler surfaces and condenses — depositing liquid moisture directly on your wooden beams, joists, and subfloor. This is the same principle as a cold glass sweating in humid weather, and it happens inside your foundation structure every summer.
These two factors together create a crawl space environment that is persistently damp in ways that passive ventilation alone cannot address.
The Progression: From Normal Humidity to Foundation Damage
Crawl space moisture doesn’t destroy a foundation overnight. It operates on a timeline — and understanding where you are on that timeline is the difference between a maintenance task and a major structural repair.
Stage 1: Elevated Humidity (Manageable)
At this stage, the crawl space has higher-than-ideal relative humidity — typically above 60 percent — but no visible condensation, standing water, or biological growth. Wood moisture content may be slightly elevated but hasn’t reached the threshold for decay or structural compromise.
Signs at this stage are subtle: a faint musty smell when you open the crawl space access hatch, or slightly higher interior humidity levels on the ground floor. This is the easiest and least expensive stage to address.
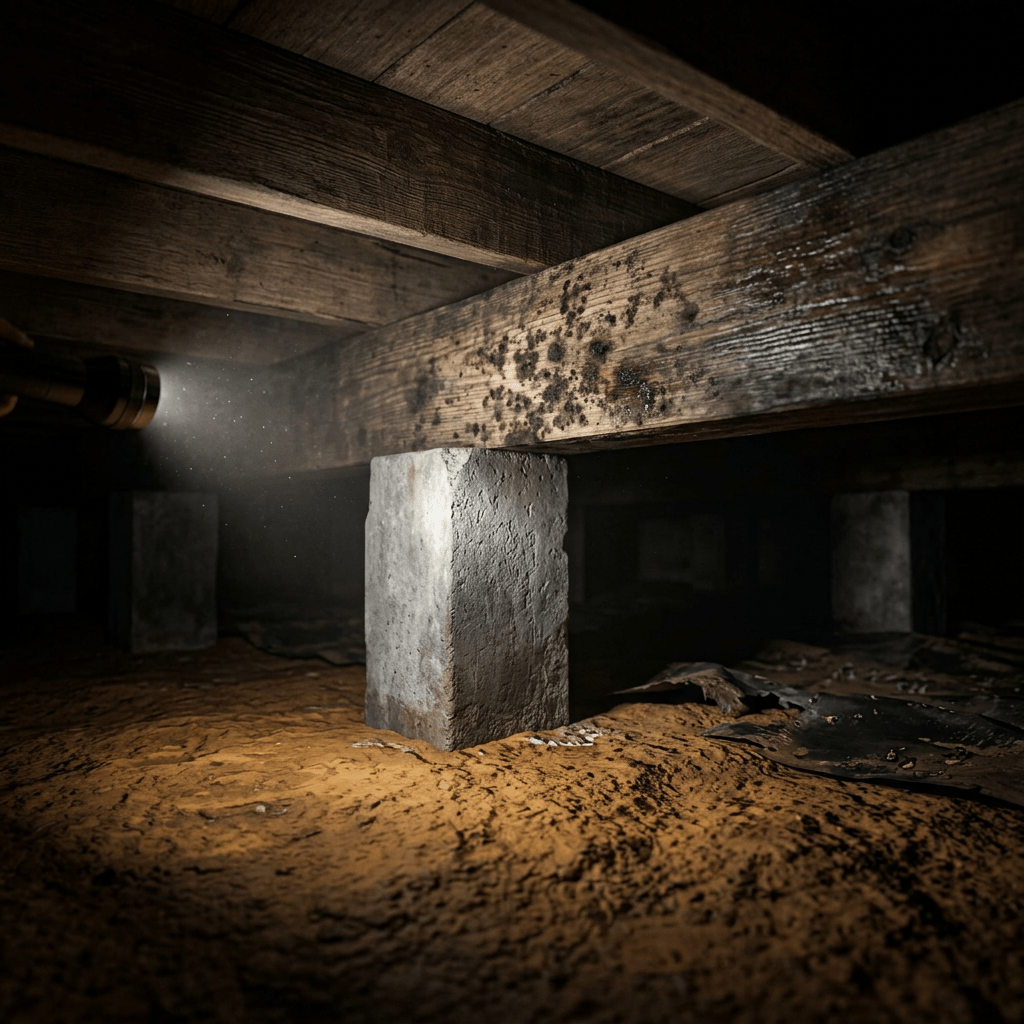
Stage 2: Active Condensation and Biological Growth (Early Damage)
Humidity levels have risen to the point where condensation is visible on pipes, structural members, or the vapor barrier (if one exists). Mold and mildew may be present — typically appearing as dark spotting on joists or subfloor sheathing. Wood moisture content is approaching or has exceeded 19 percent, the threshold at which wood-decay fungi become active.
At this stage, the structural members are not yet compromised but the biological activity is established and will progress without intervention. The remediation cost here is a fraction of what it becomes at the next stage.
Stage 3: Wood Rot and Structural Softening (Active Damage)
Wood moisture content has been above 19 percent long enough for decay fungi to consume the cellulose in the wood fibers. Joists and beams show visible softening, darkening, and in advanced cases, crumbling. This is the stage where you begin to feel the effects inside the home — spongy or bouncy floors, doors that have shifted out of square, visible deflection in the subfloor when walked upon.
This is no longer a moisture management problem. It’s a structural repair problem. The compromised members must be sistered or replaced, which means the moisture issue must also be resolved simultaneously — otherwise the new wood will follow the same progression.
Stage 4: Pest Infestation and Systemic Failure (Major Structural Repair)
Moisture-damaged wood is the preferred environment for subterranean termites and other wood-destroying insects. At this stage, the crawl space has typically been wet long enough to attract and sustain an active infestation. The combination of fungal decay and insect damage can compromise multiple structural members simultaneously, affecting large sections of the floor system.
Repairs at this stage involve pest remediation, structural beam and joist replacement, re-leveling of the pier system, and comprehensive moisture management — a full-scope project that could have been addressed at a fraction of the cost at Stage 1 or 2.
How to Inspect Your Crawl Space: What to Look For
If your home has a pier and beam foundation, you should inspect your crawl space at least once per year — ideally in late spring after the wet season and again in early fall after the summer heat. Here’s what to look for:
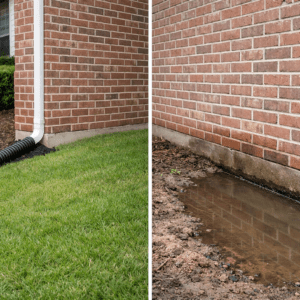
Standing water or wet soil. Any standing water beneath your home after rain events indicates inadequate drainage. Wet soil that doesn’t dry out within several days of a rain event is a chronic moisture source.
Condensation on pipes and structural members. Visible water droplets on the underside of joists, on plumbing lines, or on HVAC components indicate that humidity is reaching the condensation point regularly.
Dark spotting or fuzzy growth on wood. Any mold, mildew, or biological growth on structural members is a Stage 2 or higher condition requiring attention.
Soft or discolored wood. Press a screwdriver into any joists or beams that look darker than surrounding wood. If the wood yields easily rather than resisting firmly, decay is active.
Damaged or missing vapor barrier. A ground-level plastic vapor barrier is the first line of defense against soil moisture. Look for tears, gaps, areas where the barrier has been displaced, or sections where it was never installed.
Pest evidence. Mud tubes running along foundation walls or piers are the signature of subterranean termite activity. Sawdust-like frass near wood members indicates other wood-boring insects.
If you’re uncomfortable crawling beneath your home — which is completely understandable — a professional inspection is money very well spent.
What Causes Crawl Space Moisture Problems in North Texas Homes
Understanding the source of moisture is essential to fixing it correctly. The most common causes in our service area are:
Inadequate or missing vapor barrier. Many older North Texas homes were built without any ground-level moisture barrier in the crawl space. Without a barrier, moisture evaporates directly from the clay soil into the crawl space air continuously.
Poor exterior grading. If the soil around your home slopes toward the foundation rather than away from it, rainwater runs directly into the crawl space perimeter. This is one of the most common and most correctable causes of crawl space moisture.
Clogged or damaged foundation vents. Traditional crawl space design relies on cross-ventilation through foundation vents to exhaust humid air. Clogged, damaged, or closed vents eliminate this airflow and allow humidity to accumulate.
HVAC condensate drainage. Air conditioning units in crawl spaces produce significant condensate. If the condensate line is damaged, disconnected, or draining into the crawl space rather than outside the foundation, it becomes a continuous moisture source.
Plumbing leaks. Even small, slow drips from supply or drain lines in the crawl space deposit significant moisture over time. A plumbing leak that would be an inconvenience in an accessible location becomes a structural hazard in an enclosed crawl space.
Gutter and downspout failure. Gutters that overflow or downspouts that terminate too close to the foundation deposit water directly against the crawl space perimeter. We see this regularly across Tarrant and Parker County homes.
Solutions: From Simple Fixes to Full Crawl Space Encapsulation
Crawl space moisture management exists on a spectrum of complexity and cost. The right solution depends on the severity of the problem and the specific sources of moisture.
Foundational (Always Applicable)
- Correct exterior grading to slope away from the foundation
- Clean and confirm all gutters and downspouts are functioning and terminating correctly
- Clear all foundation vents of debris and confirm they are operable
Moisture Barrier Installation
A properly installed vapor barrier — heavy-gauge polyethylene sheeting covering all exposed soil in the crawl space, lapped and sealed at seams and run up the foundation walls — is the single most impactful improvement for most North Texas crawl spaces. This should be installed with overlapping seams and properly secured perimeter edges.
Drainage Improvements
In crawl spaces with chronic standing water issues, an interior French drain system channeling water to a sump pump may be necessary. This is a more significant investment but resolves moisture at the source rather than managing its effects.
Crawl Space Encapsulation
Full encapsulation involves sealing the crawl space from exterior air entirely — closing foundation vents, installing a sealed vapor barrier across all surfaces, and conditioning the space with a dedicated dehumidifier. Encapsulation is the most comprehensive solution and is increasingly recommended over traditional ventilated crawl space design in hot, humid climates. It is also the most expensive option and most appropriate for homes with significant moisture histories.
Structural Repair After Moisture Damage
If wood members have already been compromised by decay or pest damage, moisture management must be combined with structural repair — sistering or replacing affected joists and beams and re-leveling the pier system if settlement has occurred.
The Connection Between Crawl Space Moisture and Foundation Movement
Here’s the link that most homeowners miss: moisture damage in the crawl space doesn’t just rot wood. It also destabilizes the soil beneath the piers.
When clay soil beneath your crawl space is chronically saturated, the piers that support your home’s structure are sitting in compromised bearing material. Saturated clay loses load-bearing capacity — piers can sink, tilt, or shift, producing the same foundation movement symptoms caused by exterior soil expansion and contraction.
This is why crawl space moisture problems and pier settlement so often occur together. Addressing one without the other leaves the root cause unresolved.
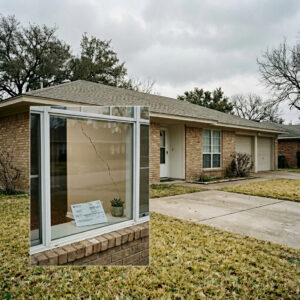
If you’ve noticed the uneven floors, sticking doors, or wall cracks that signal foundation movement, our post on what wall cracks in your home actually mean breaks down which symptoms are moisture-driven versus structural — and both matter.
It’s also worth understanding how North Texas winters amplify this problem. Freeze-thaw cycling in wet crawl space soil can accelerate pier movement significantly between November and March. We cover the seasonal dimension in detail in our post on why North Texas foundation problems get worse in winter.
When to Call a Professional
Call a foundation professional if you observe any of the following during your crawl space inspection:
- Standing water that persists more than 48 hours after a rain event
- Visible mold or biological growth on structural members
- Wood that yields to screwdriver pressure (soft, punky texture)
- Visible mud tubes indicating termite activity
- Any pier that appears to have tilted, sunk, or separated from the beam above it
- Interior symptoms — bouncy floors, sticking doors, wall cracks — combined with any of the above
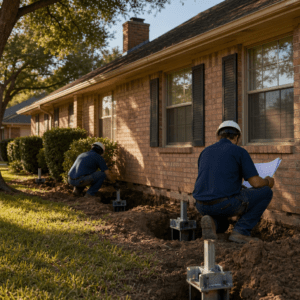
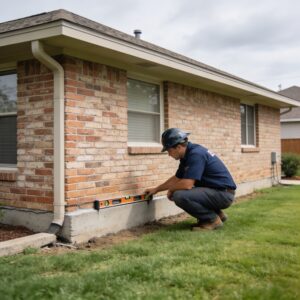
At Tri-County Foundation Repair, our crawl space and pier and beam assessments begin with the same engineering-first process as all our work. A licensed structural engineer evaluates the full condition of the foundation system — moisture damage, structural integrity, and soil bearing conditions — before any repair scope is proposed.
Call us at (817) 406-4094 or reach out through our contact form. We serve Tarrant, Wise, and Parker Counties.
Frequently Asked Questions: Crawl Space Moisture and North Texas Foundations
How much moisture is normal in a crawl space?
Relative humidity in a crawl space should ideally stay below 60 percent year-round. Wood moisture content should remain below 19 percent — the threshold above which wood-decay fungi become active. In North Texas, maintaining these levels in a traditionally vented crawl space can be challenging during humid summers and wet springs. If your crawl space regularly exceeds these thresholds, some form of moisture management beyond passive ventilation is likely necessary.
What are signs of moisture damage in a crawl space?
The most common signs include a persistent musty odor when the access hatch is opened, visible condensation on pipes or structural members, dark spotting or fuzzy biological growth on joists or subfloor sheathing, wood that feels soft or crumbles when probed, standing water or chronically wet soil, and deteriorated or missing vapor barrier material. Inside the home, early moisture damage may present as spongy or uneven floors, increased ground-floor humidity, or a musty smell that intensifies in humid weather.
Does crawl space moisture cause foundation problems?
Yes, in two distinct ways. First, chronic moisture causes wood rot and structural deterioration in the joists, beams, and subfloor that make up the pier and beam floor system. Second, chronically saturated clay soil beneath the piers loses load-bearing capacity, which can cause piers to sink, settle, or shift — producing the same foundation movement symptoms as exterior soil expansion and contraction. Addressing crawl space moisture is often inseparable from addressing pier and beam foundation performance.
What is a crawl space vapor barrier and do I need one?
A vapor barrier is a heavy-gauge polyethylene sheeting installed on the ground surface of the crawl space to block soil moisture from evaporating upward into the enclosed space. In North Texas, where clay soil retains moisture long after rain events, a vapor barrier is essentially a necessity rather than an optional upgrade. Many older pier and beam homes in Tarrant, Wise, and Parker Counties were built without one or have deteriorated barrier material that needs replacement. A properly installed vapor barrier is one of the most cost-effective foundation maintenance investments available.
Should crawl space vents be open or closed in Texas?
This is a genuinely debated topic in building science. Traditional guidance recommended keeping foundation vents open to promote cross-ventilation. More recent building science research — supported by energy codes in many states — suggests that in hot, humid climates like North Texas, open vents can actually introduce more moisture than they exhaust by allowing warm, humid summer air to contact cooler crawl space surfaces and condense. Many building professionals in this region now recommend sealed crawl space design with mechanical dehumidification over traditional vented design. The right answer depends on your specific home’s moisture profile and the crawl space conditions present.
How do I reduce moisture in my crawl space?
Start with the most accessible interventions: correct exterior grading to direct water away from the foundation, clean gutters and extend downspouts at least 4 to 6 feet from the foundation, and confirm foundation vents are clear and operable. Install or replace the vapor barrier if one is missing or damaged. For persistent moisture problems, a crawl space dehumidifier, interior drainage improvements, or full encapsulation may be necessary. Any structural wood damage discovered during this process should be addressed simultaneously with a foundation professional.
How much does crawl space moisture remediation cost in North Texas?
Costs vary significantly by the scope of the problem. Vapor barrier installation for a typical North Texas pier and beam home runs approximately $1,500 to $4,000 depending on square footage and site conditions. Crawl space encapsulation with a sealed liner, vent closures, and a dehumidifier typically ranges from $5,000 to $12,000. If structural wood damage has occurred and requires beam or joist sistering or replacement in addition to moisture remediation, total project costs increase accordingly. The earlier the moisture problem is identified and addressed, the lower the total cost.
Can I encapsulate my crawl space myself?
Basic vapor barrier installation is within the capability of a motivated DIYer — rolls of 6-mil or heavier polyethylene sheeting are available at home improvement stores and can be cut and lapped into place. However, full encapsulation — including proper seam sealing, vent closure, and mechanical conditioning — requires a level of execution that significantly affects performance. Gaps, improper seams, and incorrect vent closures can actually worsen moisture problems by trapping humidity without proper exhaust. For anything beyond a basic vapor barrier replacement, professional installation is generally worth the investment.